
OpenWrt 编译指南

本文档详细介绍了 OpenWrt 的编译步骤和配置方法。
在决定自己编译 OpenWrt 前,建议先阅读官方文档:
- 确保构建目录的完整路径中没有空格。
- 所有操作都是以普通权限用户进行,不需要用root权限。( 安装编译环境除外 )

准备编译环境
安装Ubuntu虚拟机,建议内存 8g 或以上,存储 60g 或以上。
首先更新系统并安装必要的依赖包:
sudo apt update
sudo apt install build-essential clang flex bison g++ gawk \
gcc-multilib g++-multilib gettext git libncurses5-dev libssl-dev \
python3-setuptools rsync swig unzip zlib1g-dev file wget curl
下载源码
克隆最新的23.05分支
下载其他版本修改git命令即可,可以去 Github 查看其他版本号Github Branches
建议:下载路径中不要包含中文
mkdir ~/openwrt
setfacl -d --set u::rwx,g::rx,o::rx ~/openwrt
cd openwrt
git clone -b openwrt-23.05 --single-branch --filter=blob:none https://github.com/openwrt/openwrt.git
查看拉取的版本
git branch
修改软件源
可以修改feeds.conf.default文件来配置软件源
编辑 feeds 配置文件:
nano feeds.conf.default
src-git packages https://github.com/openwrt/packages.git;openwrt-23.05
src-git luci https://github.com/openwrt/luci.git;openwrt-23.05
src-git routing https://github.com/openwrt/routing.git;openwrt-23.05
src-git telephony https://github.com/openwrt/telephony.git;openwrt-23.05

# 可选软件源

# iStore
src-git istore https://github.com/linkease/istore;main

# openClash
src-git openclash https://github.com/vernesong/OpenClash.git

# helloworld
# src-git helloworld https://github.com/fw876/helloworld.git

# taskplan
src-git taskplan  https://github.com/sirpdboy/luci-app-taskplan

# parentcontrol
src-git parentcontrol https://github.com/sirpdboy/luci-app-parentcontrol

# 第三方源
# src-git nas https://github.com/linkease/nas-packages.git;master
# src-git nas_luci https://github.com/linkease/nas-packages-luci.git;main

src-git smpackage https://github.com/kenzok8/small-package
# src-git kenzo https://github.com/kenzok8/openwrt-packages
# src-git small https://github.com/kenzok8/small
修改配置
可以在编译根目录下创建 files 文件夹,目录里的文件,都会添加到最终的固件里。参考 OpenWRT/Packages
修改默认管理 IP
默认管理 IP 为 192.168.1.1,建议修改为其他的。
nano +165 package/base-files/files/bin/config_generate
将对应的ip修改为自己想要的就行
添加默认 WiFi 配置
在编译根目录创建无线配置文件 /files/etc/config/wireless
mkdir -p files/etc/config

cat > files/etc/config/wireless << 'EOF'
config wifi-device 'radio0'
        option type 'mac80211'
        option path 'platform/18000000.wifi'
        option channel '1'
        option band '2g'
        option htmode 'HE20'
        option country 'CN'
        option disabled '0'
        option cell_density '0'

config wifi-iface 'default_radio0'
        option device 'radio0'
        option network 'lan'
        option mode 'ap'
        option ssid 'openwrt-xiaci-2.4G'
        option encryption 'sae-mixed'
        option key '12345678'

config wifi-device 'radio1'
        option type 'mac80211'
        option path 'platform/18000000.wifi+1'
        option channel '36'
        option band '5g'
        option htmode 'HE80'
        option country 'CN'
        option disabled '0'
        option cell_density '0'

config wifi-iface 'default_radio1'
        option device 'radio1'
        option network 'lan'
        option mode 'ap'
        option ssid 'openwrt-xiaci-5G'
        option encryption 'sae-mixed'
        option key '12345678'

EOF
添加默认插件下载源
在编译根目录创建源配置文件 files/etc/opkg/distfeeds.conf
mkdir -p files/etc/opkg

# 注意型号需要改为适配自己的
cat > files/etc/opkg/distfeeds.conf << 'EOF'
src/gz openwrt_core https://mirrors.tuna.tsinghua.edu.cn/openwrt/releases/23.05.4/targets/mediatek/filogic/packages
src/gz openwrt_base https://mirrors.tuna.tsinghua.edu.cn/openwrt/releases/23.05.4/packages/aarch64_cortex-a53/base
src/gz openwrt_luci https://mirrors.tuna.tsinghua.edu.cn/openwrt/releases/23.05.4/packages/aarch64_cortex-a53/luci
src/gz openwrt_packages https://mirrors.tuna.tsinghua.edu.cn/openwrt/releases/23.05.4/packages/aarch64_cortex-a53/packages
src/gz openwrt_routing https://mirrors.tuna.tsinghua.edu.cn/openwrt/releases/23.05.4/packages/aarch64_cortex-a53/routing
src/gz openwrt_telephony https://mirrors.tuna.tsinghua.edu.cn/openwrt/releases/23.05.4/packages/aarch64_cortex-a53/telephony
EOF
添加第一次启动时的配置脚本
在
/files/etc/uci-defaults创建的脚本会在第一次启动时自动执行一次,执行完后会自动删除。
- 可以使用数字前缀来控制执行顺序(数字越小优先级越高)
mkdir -p files/etc/uci-defaults

# 文件以 99 开头会最后执行
cat > files/etc/uci-defaults/99-custom-settings << 'EOF'
#!/bin/sh

# 设置 LuCI 默认语言为中文
uci set luci.main.lang='zh_cn'

# ......

# 提交所有更改
uci commit

exit 0
EOF

# 添加执行权限
chmod +x files/etc/uci-defaults/99-custom-settings
修改登录默认密码
密码加密存储在 package/base-files/files/etc/shadow 文件,可以在刷好openwrt的路由器中复制值。
先设置好密码,然后使用ssh连接openwrt,运行
cat /etc/shadow
输出类似
[root@OpenWrt:05:23 PM ~] # cat /etc/shadow
root:$1$r0e/cBCk$TAG0CL3zhGUHsiGOUIZpd.:20508:0:99999:7:::
daemon:*:0:0:99999:7:::
ftp:*:0:0:99999:7:::
network:*:0:0:99999:7:::
nobody:*:0:0:99999:7:::
ntp:x:0:0:99999:7:::
dnsmasq:x:0:0:99999:7:::
logd:x:0:0:99999:7:::
p910nd:x:0:0:99999:7:::
ubus:x:0:0:99999:7:::
复制 root 那一行,回到源码目录覆盖package/base-files/files/etc/shadow中的值
nano package/base-files/files/etc/shadow
下载并安装 feeds
更新并安装所有 feeds 源中的软件包:
./scripts/feeds update -a
./scripts/feeds install -a
配置编译选项
make menuconfig
详细介绍看配置菜单结构简介
常用插件介绍
在 LuCI -> 3. Applications 中配置
注意:有些插件不在 OpenWrt 官方源码中,需要额外添加软件源(feeds),例如
kenzok8/small-package或immortalwrt的仓库。
推荐插件
- luci-app-firewall 默认防火墙
- luci-app-adguardhome AdGuard Home 广告过滤
- luci-app-commands 运行自定义 Shell 命令
- luci-app-ramfree 释放内存
- luci-app-argon-config Argon 主题设置,如果主题是 Argon 建议选
- luci-app-diskman 磁盘管理工具
- luci-app-hd-idle 硬盘休眠
- luci-app-store 软件商店
- luci-app-ttyd 终端
- luci-app-vlmcsd KMS 服务器(Windows 激活工具)
- luci-app-wolplus Wake-on-LAN 网络唤醒
- luci-app-ksmbd 路由器文件共享(SMB)
- luci-app-filetransfer 上传下载文件
- luci-app-appfilter 指定应用流量过滤拦截
- luci-app-smartdns DNS 服务器
网络加速
- luci-app-sfe Turbo ACC 网络加速(开启 Fast Path 转发加速)
- luci-app-flowoffload 网络加速(Offloading 引擎)
- luci-app-sqm 流量智能队列管理(QOS)
网络共享与存储
- luci-app-samba 网络共享(Samba)
- luci-app-cifs-mount 挂载 CIFS/SMB 网络共享
- luci-app-vsftpd FTP 服务器
- luci-app-usb-printer USB 打印服务器
- luci-app-rclone rclone(云存储同步工具)
VPN 服务
- luci-app-openvpn OpenVPN 客户端
- luci-app-wireguard WireGuard VPN 状态和配置
- luci-proto-wireguard WireGuard 协议支持
- luci-app-zerotier ZeroTier 虚拟局域网
- luci-app-tailscale Tailscale VPN
代理工具
- luci-app-ssr-plus SSR/SS/V2Ray/Trojan 集成管理
- luci-app-passwall 代理集成管理工具
- luci-app-passwall2 Passwall 新版本
- luci-app-openclash Clash 内核图形管理
- luci-app-homeproxy 支持 Sing-box 核心的代理工具
- luci-app-bypass 简洁版代理插件
- luci-app-v2raya V2Ray Web 管理界面
内网穿透
- luci-app-frpc Frp 客户端
- luci-app-frps Frp 服务端
- luci-app-nps NPS 内网穿透工具
网络工具
- luci-app-ddns 动态域名解析
- luci-app-upnp UPnP(端口自动转发)
- luci-app-arpbind IP/MAC 绑定
- luci-app-eqos 基于 IP 的限速
- luci-app-nft-qos 基于 nftables 的 QoS
监控与管理
- luci-app-nlbwmon 网络带宽监视器
- luci-app-wrtbwmon 实时流量监测
- luci-app-statistics 系统运行统计
- luci-app-accesscontrol 上网时间控制
- luci-app-autoreboot 计划重启
- luci-app-webadmin Web 管理页面设置
- luci-app-commands 自定义 Shell 命令
下载工具
- luci-app-aria2 Aria2 下载工具
- luci-app-qbittorrent qBittorrent 下载
其他工具
- luci-app-docker Docker 容器管理
- luci-app-adbyby-plus 广告屏蔽大师 Plus+
- luci-app-unblockmusic 解锁网易云音乐
建议添加
mtd-rw 是用于获取底层分区写入权限的内核模块,可以在系统运行时刷入底层,也可以在需要时安装。
Kernel modules  --->
    Other modules  --->
        <*> kmod-mtd-rw
开始编译
下载依赖源代码
先下载所有依赖的源代码,否则多核编译时容易失败。
make download
编译
单核编译
make V=s
全核编译
make -j$(nproc) V=s
如果当前只有编译工作,则可以使用。
make -j $(($(nproc)+1)) V=s
首次编译需要较长时间,看cpu性能,我第一次编译,虚拟机分配了15个核心,编译了2个多小时
如果构建失败,最简单的发现错误方法是:
make V=s 2>&1 | tee build.log | grep -i -E "^make.*(error|[12345]...Entering dir)"

make V=s 2>&1 | tee build.log | grep -i '[^_-"a-z]error[^_-.a-z]'
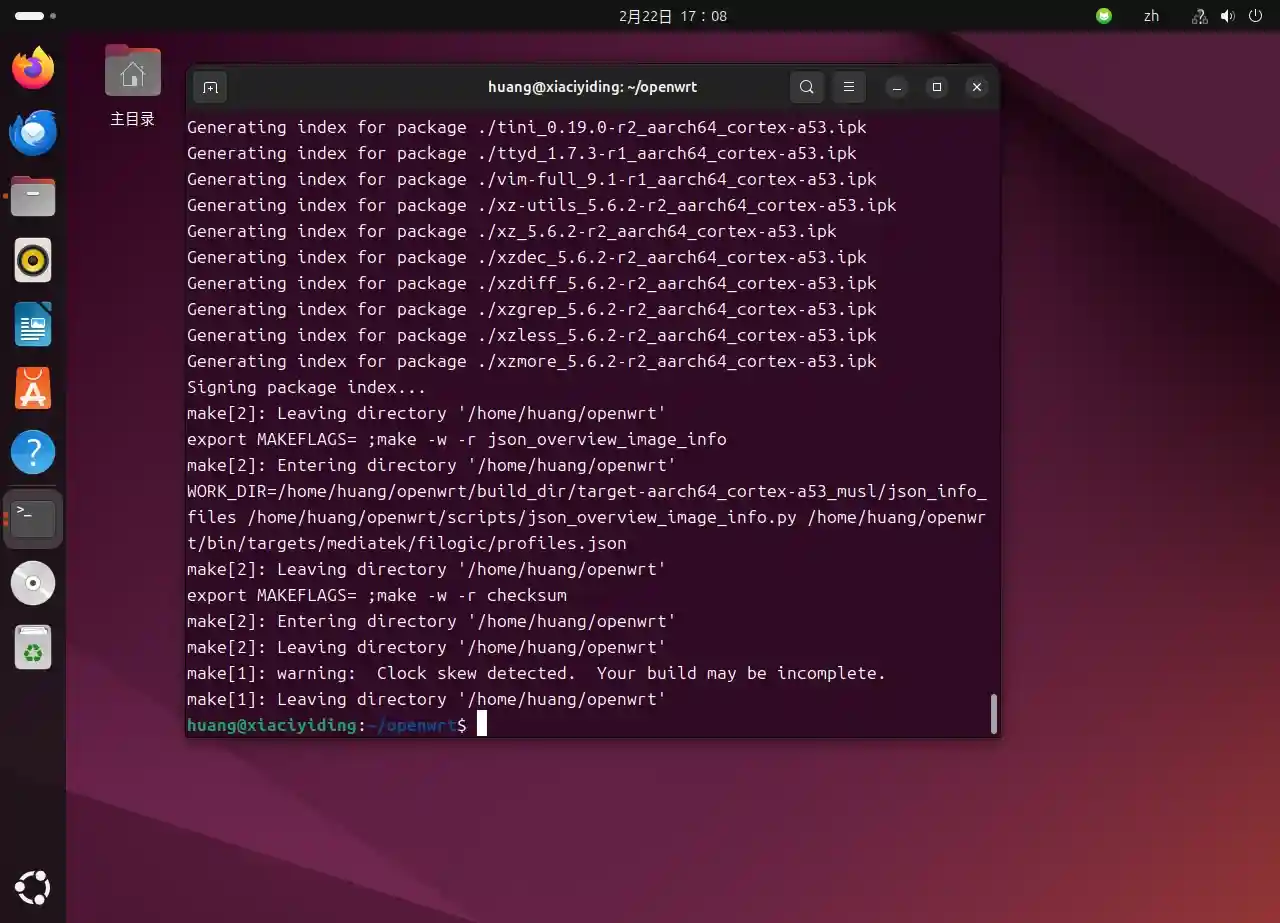
编译成功图
编译输出目录
编译完成后,固件文件位于
bin/targets/文件夹里
修改配置后再次编译
- 只重新打包固件或修改了软件包配置时
make clean清理编译出的二进制文件(固件、内核、软件包) - 编译后,如果需要更换构建型号,需要先清理之前的编译文件
make dirclean
ImageBuilder
ImageBuilder是一个预编译好的固件构建工具。它可以像“搭积木”一样,通过对官方已编译好的二进制包进行增删、集成配置文件,在几分钟内快速定制固件。
我遇到过的问题
构建时权限异常导致失败
目前的 OpenWrt(至少从 21.02 版本开始)存在一个问题:某些设置中的 OpenWrt 镜像可以成功构建,但安装在设备上时,会在启动时卡住,ubus 不工作。运行
umask,查看输出是否是0022或0002,是则没问题。否则请查看下方解决方案。按照本教程在拉取源码前设置了文件夹权限的应该没这个问题。
原因 OpenWrt 编译系统依赖 Unix 风格的文件权限,但 Git 不存储完整权限,权限由系统默认管理
解决方案 详见 GitHub Issue #9545
dockerd 编译报错
Please make sure you have the correct access rights
and the repository exists.
Trying remote 'https://github.com/docker/cli'
fatal: unable to access 'https://github.com/docker/cli/': gnutls_handshake() failed: The TLS connection was non-properly terminated.
Trying remote 'http://github.com/docker/cli'
fatal: unable to access 'http://github.com/docker/cli/': The requested URL returned error: 502
Trying remote 'git@github.com/docker/cli'
fatal: 'git@github.com/docker/cli' does not appear to be a git repository
fatal: Could not read from remote repository.
Please make sure you have the correct access rights
and the repository exists.
ERROR: Expected 'PKG_GIT_SHORT_COMMIT:=', found 'PKG_GIT_SHORT_COMMIT:=ce12230'
make[3]: *** [Makefile:85: /home/huang/openwrt/openwrt24.10.5/build_dir/target-aarch64_cortex-a53_musl/docker-27.3.1/.prepared_ecedeaa069d4a7d1acd4fc56e90d8375_6664517399ebbbc92a37c5bb081b5c53] Error 1
make[3]: Leaving directory '/home/huang/openwrt/openwrt24.10.5/feeds/packages/utils/docker'
time: package/feeds/packages/docker/compile#2.00#1.62#13.39
   ERROR: package/feeds/packages/docker failed to build.
make[2]: *** [package/Makefile:176: package/feeds/packages/docker/compile] Error 1
make[2]: Leaving directory '/home/huang/openwrt/openwrt24.10.5'
make[1]: *** [package/Makefile:170: /home/huang/openwrt/openwrt24.10.5/staging_dir/target-aarch64_cortex-a53_musl/stamp/.package_compile] Error 2
make[1]: Leaving directory '/home/huang/openwrt/openwrt24.10.5'
make: *** [/home/huang/openwrt/openwrt24.10.5/include/toplevel.mk:233:world] 错误 2
huang@xiaciyiding:~/openwrt/openwrt24.10.5$
原因 根据我的搜索结果来看,这并不是网络问题引起的失败,而是 OpenWrt 中 dockerd 软件包的一个代码逻辑缺陷,大概是 OpenWrt 在编译 dockerd 时拉取 Docker 的源码,根据源码的 Git 提交 ID 生成一个短 ID。但是,检查脚本期望得到一个特定长度的完整短 ID (41ca978a0a54),却只获取到了一个更短的版本(41ca978),两者不匹配,于是编译系统认为文件损坏或版本不对,直接报错退出了。
解决方案 这个问题已经被修复了,详见 OpenWrt软件包更新日志,重新单独编译这个包试试。
终端不见了 / 被 kill 了
问题 晚上开始了编译,一大早起来发现我的终端进程没了。
解决过程 我将虚拟机内存从 8g -> 16g 后,编译成功了,故怀疑是内存不足导致的。
建议 如果插件依赖 JavaScript 建议内存 12g 以上,16g 最好,尽管大部分时间用不到。
Rust 错误:从CI下载LLVM失败
curl: (22) The requested URL returned error: 404
Warning: Problem (retrying all errors). Will retry in 1 seconds. 3 retries
Warning: left.
curl: (22) The requested URL returned error: 404
Warning: Problem (retrying all errors). Will retry in 2 seconds. 2 retries
Warning: left.
curl: (22) The requested URL returned error: 404
Warning: Problem (retrying all errors). Will retry in 4 seconds. 1 retries
Warning: left.
curl: (22) The requested URL returned error: 404

ERROR: failed to download llvm from ci

    HELP: There could be two reasons behind this:
        1) The host triple is not supported for `download-ci-llvm`.
        2) Old builds get deleted after a certain time.
    HELP: In either case, disable `download-ci-llvm` in your bootstrap.toml:

    [llvm]
    download-ci-llvm = false

Build completed unsuccessfully in 0:03:57
make[3]: *** [Makefile:108: /home/huang/openwrt/openwrt24.10.5/build_dir/target-aarch64_cortex-a53_musl/host/rustc-1.89.0-src/.built] Error 1
make[3]: Leaving directory '/home/huang/openwrt/openwrt24.10.5/feeds/packages/lang/rust'
time: package/feeds/packages/rust/host-compile#403.03#210.14#238.51
    ERROR: package/feeds/packages/rust [host] failed to build.
make[2]: *** [package/Makefile:174: package/feeds/packages/rust/host/compile] Error 1
make[2]: Leaving directory '/home/huang/openwrt/openwrt24.10.5'
make[1]: *** [package/Makefile:170: /home/huang/openwrt/openwrt24.10.5/staging_dir/target-aarch64_cortex-a53_musl/stamp/.package_compile] Error 2
make[1]: Leaving directory '/home/huang/openwrt/openwrt24.10.5'
make: *** [/home/huang/openwrt/openwrt24.10.5/include/toplevel.mk:233:world] 错误 2
huang@xiaciyiding:~/openwrt/openwrt24.10.5$
原因 官方服务器会清理旧文件:Rust 团队的 CI 服务器只会保留相对较新的构建产物。时间一长,旧版本的 rust-dev 包就会被删除,导致下载链接失效。
解决方案 修改 Rust 包的 Makefile,位置在
/feeds/packages/lang/rust,禁用 download-ci-llvm 功能,将 download-ci-llvm 改为 false,也就是自己编译 LLVM。在报错日志中也说了
ERROR: failed to download llvm from ci

    HELP: There could be two reasons behind this:
        1) The host triple is not supported for `download-ci-llvm`.
        2) Old builds get deleted after a certain time.
    HELP: In either case, disable `download-ci-llvm` in your bootstrap.toml:

    [llvm]
    download-ci-llvm = false
需要注意的是,我在编译 LLVM 时,内存占用最高达到了11g。
补充说明
项目编译常用命令介绍
软件包 feeds 管理
feeds 是 OpenWrt 的软件包仓库系统,用于管理第三方软件包。
./scripts/feeds update -a |
更新所有 feeds 中的软件包列表 |
./scripts/feeds install -a |
安装所有 feeds 中的软件包 |
./scripts/feeds install <包名> |
安装指定的单个软件包 |
配置命令
make menuconfig |
进入图形化配置界面,选择目标平台、内核模块、软件包等 |
make kernel_menuconfig |
配置内核选项(需开启开发选项后可用) |
make defconfig |
使用当前配置或默认配置生成规范的 .config 文件 |
编译命令
make 或 make world |
执行完整编译,生成固件 |
make -jN |
使用 N 个线程并行编译(例如 -j4 用4线程,-j$(nproc) 用所有核心) |
make V=99 或 make V=s |
输出详细编译信息,便于调试 |
make -j$(nproc) V=99 |
常用组合:多线程编译 + 详细输出 |
make package/<包名>/compile |
单独编译某个软件包(如 make package/luci/compile) |
make package/<包名>/clean |
清理某个软件包的编译文件 |
make target/linux/compile |
仅编译内核 |
清理命令
| 清理命令 | 清理内容 | 适用场景 |
|---|---|---|
make clean |
清理编译出的二进制文件(固件、内核、软件包) | 只重新打包固件或修改了软件包配置时 |
make dirclean |
清理编译出的二进制 + 工具链 + 编译工具 + tmp/ | 更换目标平台或大幅修改配置时 |
make distclean |
清理所有(包括配置文件、下载的源码、工具链) | 彻底重置编译环境或换分支时 |
make config-clean |
只清理配置文件相关临时文件 | 解决配置菜单异常时 |
其他实用命令
make download |
预下载所有源代码包(编译前可先运行,避免编译时卡在下载) |
make check |
检查编译环境配置 |
make info |
显示可编译的目标平台信息 |
make whatdepends <包名> |
查看包依赖关系 |
make menuconfig 界面解读
配置菜单结构简介
├── Target System (MediaTek Ralink ARM)             选择目标硬件平台(CPU 架构)
├── Subtarget (Filogic 8x0 (MT798x))                选择具体的芯片系列
├── Target Profile (CMCC RAX3000M)                  选择具体的设备型号
├── Target Images                                   配置固件镜像格式(squashfs/ext4、压缩方式等)
├── [ ] Enable experimental features by default     是否启用实验性功能(不建议新手开启)
├── Global build settings                           全局编译设置(优化选项、调试信息等)
├── [ ] Advanced configuration options (for developers)     高级配置选项(开发者专用)
├── [ ] Build the OpenWrt Image Builder             构建镜像生成器(用于快速定制固件)
├── [ ] Build the OpenWrt SDK                       构建软件开发工具包(用于编译第三方软件包)
├── [ ] Package the OpenWrt-based Toolchain         打包交叉编译工具链
├── [*] Image configuration                         镜像配置
│   ├── [ ] Use preinit IP configuration as default LAN IP   将预初始化IP配置设为默认LAN IP(启用后,Preinit configuration options中的IP会成为系统启动后的管理地址)
│   ├── [ ] Preinit configuration options           配置系统早期启动阶段的行为,如故障安全模式下的IP和消息显示
│   ├── [ ] Init configuration options              配置系统初始化阶段的行为
│   ├── [*] Version configuration options           固件版本信息等
│   └── [ ] Separate feed repositories              独立的软件源仓库
│
├── Base system                                     基础系统组件
├── Administration                                  系统管理工具
├── Boot Loaders                                    引导加载程序
├── Development                                     开发工具
├── Extra packages                                  额外软件包
├── Firmware                                        硬件固件
├── Fonts                                           字体文件
│
├── Kernel modules                                  Linux内核模块(硬件驱动和内核功能扩展)
│   ├── Block Devices                               块设备驱动(SATA/NVMe/USB存储等)
│   ├── Filesystems                                 文件系统驱动(ext4/NTFS/Btrfs等)
│   ├── GPIO support                                通用输入输出引脚控制
│   ├── Hardware Monitoring Support                 硬件监控(温度/电压/风扇传感器)
│   ├── I2C support                                 I2C总线设备支持
│   ├── Input modules                               输入设备(键盘/鼠标/触摸屏)
│   ├── LED modules                                 LED状态指示灯控制
│   ├── Netfilter Extensions                        防火墙扩展(连接跟踪/包过滤)
│   ├── Network Devices                             网络设备驱动(以太网卡/交换机)
│   ├── Network Support                             网络协议(桥接/VLAN/QoS/隧道)
│   ├── Sound Support                               音频设备驱动
│   ├── USB Support                                 USB设备支持(存储/串口/网卡)
│   ├── Video Support                               视频设备(摄像头/显示接口)
│   └── Wireless Drivers                            无线网卡驱动(WiFi芯片)
│
├── Languages                                       编程语言解释器和运行时
├── Libraries                                       系统库文件
│
├── LuCI                                            OpenWrt官方Web管理界面
│   ├── 1. Collections                              功能集合包
│   ├── 2. Modules                                  核心功能模块
│   ├── 3. Applications                             第三方应用插件
│   │   └── 更多第三方应用...
│   │
│   ├── 4. Themes                                   界面主题
│   ├── 5. Protocols                                协议支持模块
│   └── 6. Libraries                                依赖库文件(LuCI运行时所需的库)
│
├── Mail                                            邮件服务
├── Multimedia                                      多媒体应用
│
├── Network                                         网络应用和服务
│   ├── File Transfer                               文件传输工具
│   ├── Firewall                                    防火墙工具
│   ├── IP Addresses and Names                      IP地址和名称服务
│   ├── Routing and Redirection                     路由和重定向协议
│   ├── SSH                                         SSH服务
│   ├── Time Synchronization                        时间同步服务
│   ├── VPN                                         VPN虚拟专用网
│   ├── Web Servers/Proxies                         Web服务器和代理
│   ├── WiFi                                        无线网络工具
│   └── 其他网络工具
│
├── Sound                                           音频处理工具
│
├── Utilities                                       系统实用工具
│   ├── Compression                                 压缩解压工具
│   ├── Disc                                        磁盘工具
│   ├── Editors                                     文本编辑器
│   ├── Filesystem                                  文件系统工具
│   ├── Shells                                      Shell环境
│   ├── Terminal                                    终端工具
│   └── 其他实用工具
│
└── Xorg                                            图形界面支持(一般不需要)